How do we render the vertices and textures of polygons into a colorful scene? This is where OpenGL shaders come into play. Today, we’ll discuss the shaders of ps2mc-browser.
To briefly introduce, ps2mc-browser is a PS2 memory card viewer capable of parsing vertex and texture data from 3D icons within PS2 memory card files and rendering them using OpenGL.
In the following content, I’ll dissect the six OpenGL shaders used in ps2mc-browser one by one. Let’s dive into understanding how they work.
Background Shaders (bg.frag and bg.vert)
These shaders are primarily responsible for rendering the background color. As we learned from previous articles, the icon.sys file provides data for the colors and transparency of the four vertices of the background.
Let’s revisit the coordinate system we created:
Since the space we create is a cube with each side having a length of 2, and the origin coordinates are at the center of the cube. Additionally, our camera is in the negative direction of the z-axis. Let’s imagine which face of the cube should be the background face:
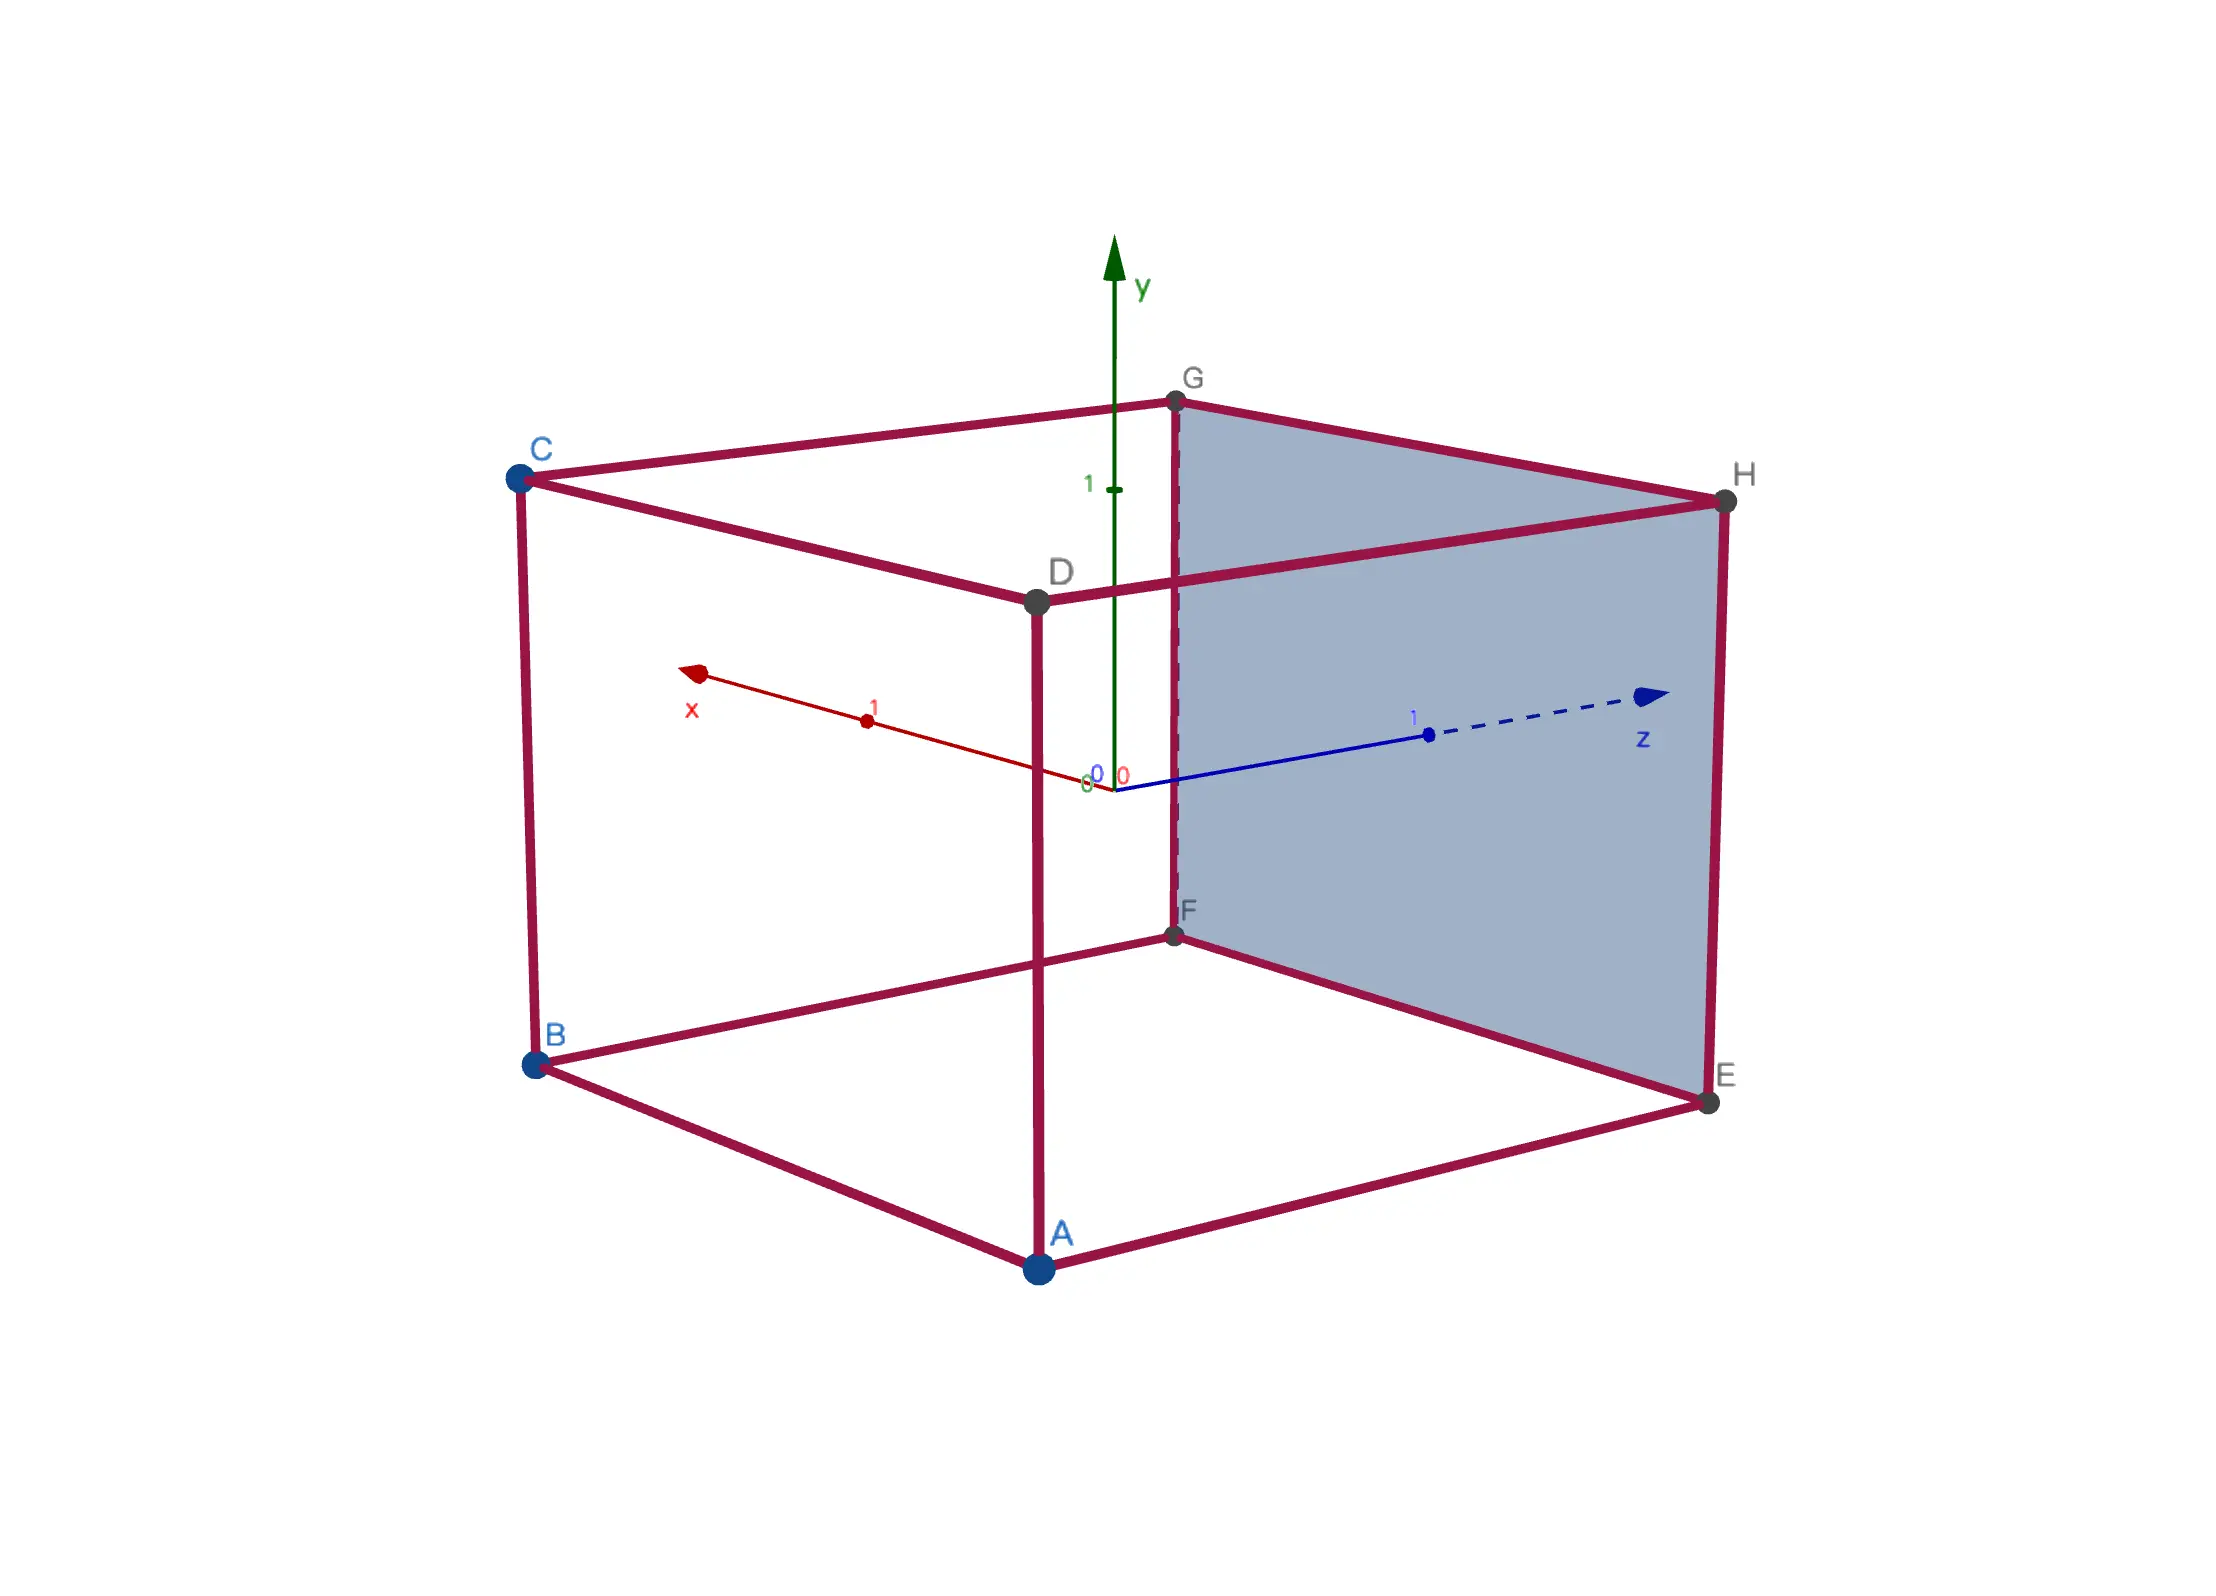
Therefore, we can construct the coordinates of the four vertices of the background as:
| |
By the way, in shaders, rendering is done on a per-triangle basis. Therefore, this square face should be split into two triangles. Now, we’ll fill in the corresponding color values for these 4 coordinates, and the shader will render the color for the entire face.
| |
In the fragment shader for the background (bg.frag), we input a color (fragColor0), and then assign its value to the output color (fragColor). This process essentially renders the background color.
| |
In the vertex shader for the background (bg.vert), we first define a vertex position (vertexPos) and a color value (vertexColor) as inputs. Then, we pass the color value to the fragment shader and set the vertex position (gl_Position).
It can be said that the main responsibility of the background shader is to fill the desired color onto the screen.
We’re not done yet. Previously, we mentioned that besides color data, the background also has transparency data. How do we represent transparency? We’ll add another layer behind the background layer, which we call the skybox layer, and add some color to this layer. This way, if the background layer has transparency, some of the color from the skybox layer will show through the background layer, achieving the desired visual effect.
| |
Finally, here’s an example of the background effect. You can see that the color transition in the middle is automatically calculated by shader interpolation.
Icon Shaders (icon.frag and icon.vert)
This is the most complex part, responsible for rendering the 3D icons parsed from the PS2 memory card files. As mentioned earlier, shaders render triangles formed by vertices one by one.
| |
In the fragment shader for the icons (icon.frag), the “uniform” keyword introduces some constants, including the texture (texture0), ambient light (ambient), and lighting (lights).
Next, we calculate a unit normal vector (normal), retrieve the color from the texture, and compute the diffuse reflection (diffuse). Specifically, each light contributes to the diffuse reflection, which depends on the angle between the light direction and the normal vector. We sum up the contributions of all lights to obtain the final diffuse reflection.
Finally, we multiply the ambient light and diffuse reflection by the texture color to get the final color (finalColor), which is then passed to the output color (fragColor) of the fragment shader.
| |
In the vertex shader for the icons (icon.vert), we use the uniform keyword to set up some matrices (proj, view, model) and an interpolation factor (tweenFactor).
Let’s focus on the interpolation factor (tweenFactor) here. This value is crucial for achieving animation effects in 3D icons. Since each memory card contains not only the complete set of vertices for the icon but also additional vertex coordinates for different actions, which we refer to as action frames, animating the frames in a loop creates the animation effect. Therefore, we need to interpolate between adjacent action frames to calculate the vertex coordinates. The tweenFactor represents the time factor between the current frame and the next frame.
Next, we pass the texture coordinates (uv0) and the normal vector (normal0) to the fragment shader. We interpolate between the current vertex position (vertexPos) and the next vertex position (nextVertexPos) based on the tween factor. Then, we transform the interpolated position using the model matrix (model) and finally transform it into homogeneous clipping space using the view matrix (view) and projection matrix (proj).
With this, the icon shader’s task is completed.
Button Shaders (circle.frag and circle.vert)
Responsible for rendering interactive buttons for mouse interaction. ps2mc-browser can display various actions of characters in the memory card. Users can click on the corresponding buttons to switch between different actions.
| |
In this circle.frag, we directly set the color (fragColor) to semi-transparent white and do not accept any inputs.
| |
In circle.vert, we only need to receive a vertex position (vertexPos) as input and then assign it to the OpenGL built-in variable gl_Position.
In simple terms, the button shader’s job is to draw a semi-transparent white geometric shape as a button. The number of buttons it needs to render and their coordinates are all calculated by the program and passed to the shader.
Summary
So far, we have detailed how ps2mc-browser renders 3D dynamic icons using OpenGL shaders. Both Python and OpenGL were new to me, and I didn’t expect to integrate them together for this project. There may be some new features added to this project in the future, so until next time, goodbye.